SharePoint Framework is the new development model that provides full support for client-side SharePoint development, easy integration with SharePoint data and support for open source tooling. With the SharePoint Framework, you can use modern web technologies and tools in your preferred development environment to build productive experiences and apps in SharePoint. In this article, we will see how to create SharePoint List with custom Site Columns and Content Type using SharePoint Framework.
Step 1 :
We can create the directory, where we will be adding the solution, using the command given below.
Open Node.js Command Prompt. By default, CMD set default user location C:\Users\ _PCName_
Create a new project directory by md command.
md CreateSPListStep 2 :
Let’s move to the newly created working directory, using the command.
cd CreateSPList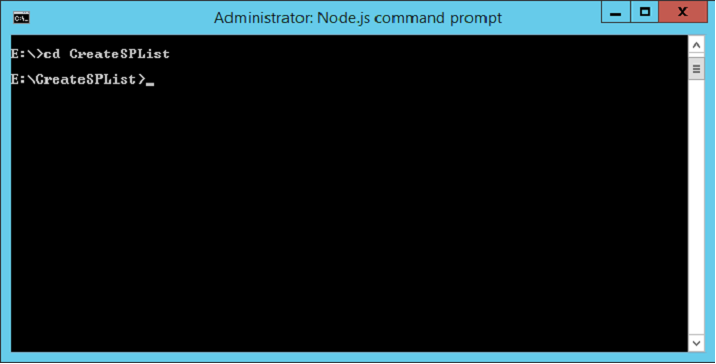
Step 3 :
Now run Yeoman SharePoint Generator to create a new client Web part.
yo @microsoft/sharepointNow prompted ask set of configuration about web part.
A) Now prompted:
- Accept the default create-sp-list as your solution name, and then select Enter.
- Select SharePoint Online only (latest), and select Enter.
- Select Use the current folder for where to place the files.
- Select N to allow the solution to be deployed to all sites immediately.
- Select N on the question if solution contains unique permissions.
- Select WebPart as the client-side component type to be created.
B) The next set of prompts ask for specific information about your web part:
- Accept the default HelloWorld as your web part name, and then select Enter.
- Accept the default HelloWorld description as your web part description, and then select Enter.
- Accept the default No javascript framework as the framework you would like to use, and then select Enter.
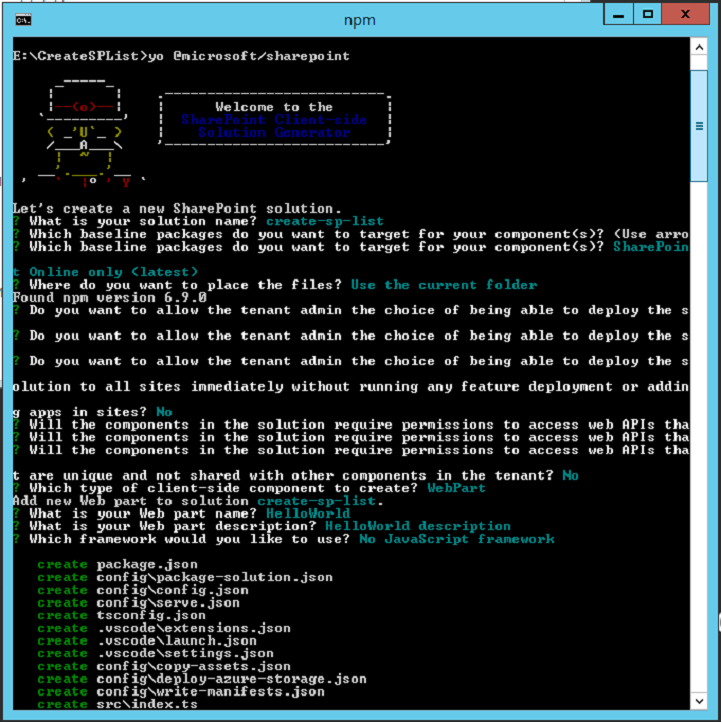
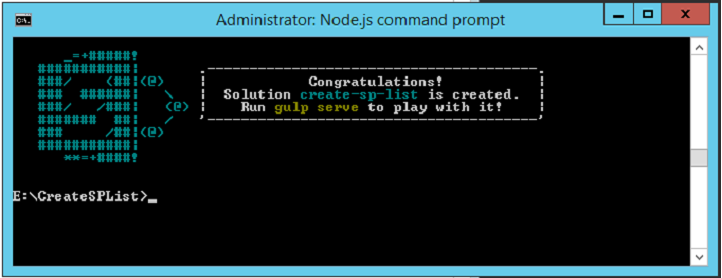
Yeoman has started working on the scaffolding of the project. It will install the required dependencies and scaffold the solution files for the ‘CreateSPList’ Web part, which will take some time to complete. Once completed, we will get a congratulations message.
- To use Visual Studio Code to explore the web part project structure.
Enter the following command to open the web part project in Visual Studio Code
Code .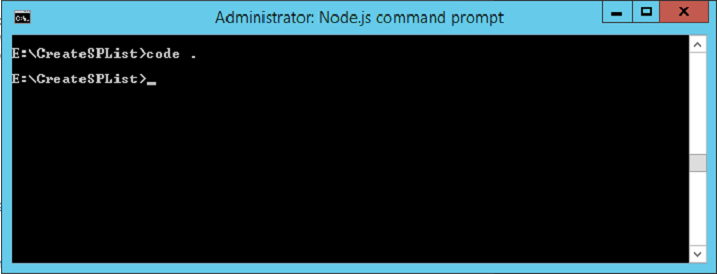
OR
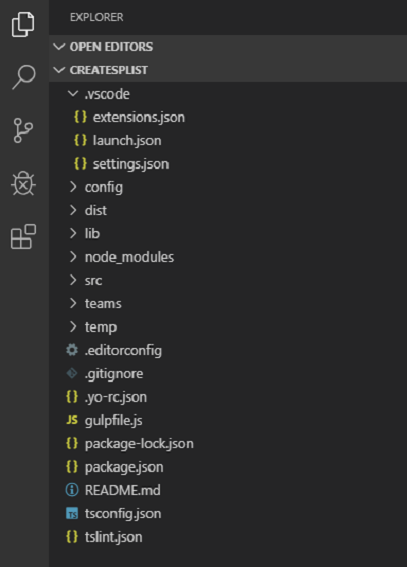
- Open Visual Code Editor. From the menu bar, select Files => Open Folder option to open CreateSPList’.
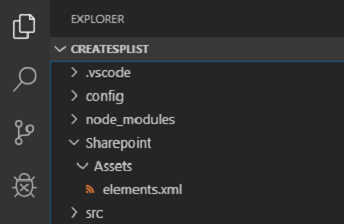
- Now Visual Code dashboard show CreateSPList’ project structure see screenshot below
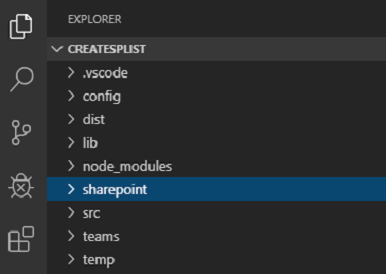
- Now, let’s add the folder named ‘Sharepoint’ to maintain the SharePoint files that will be deployed as a package.
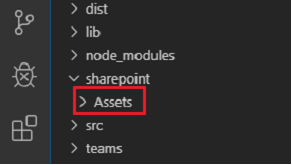
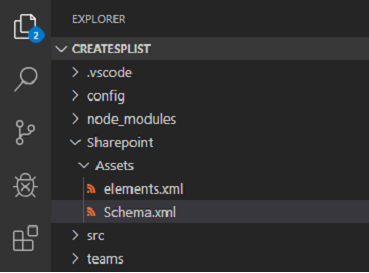
- Within the SharePoint folder, let’s add another sub folder named Assets.
We will be creating two xml files – elements.xml and schema.xml. These will hold the information required to create the site columns, content type and then use them to create the list. Let’s create the first supporting xml file elements.xml.
Elements.xml file will contain the list information that will be used to create the list. At first, we will be defining the site columns using the ‘Field’ tag and then the content type that will be deployed to the site. We will also be defining the default data that will be provisioned along with the list.
Add the Default data to SharePoint List
We will be adding the default data within the Rows tag, as shown below.
Elements.XML
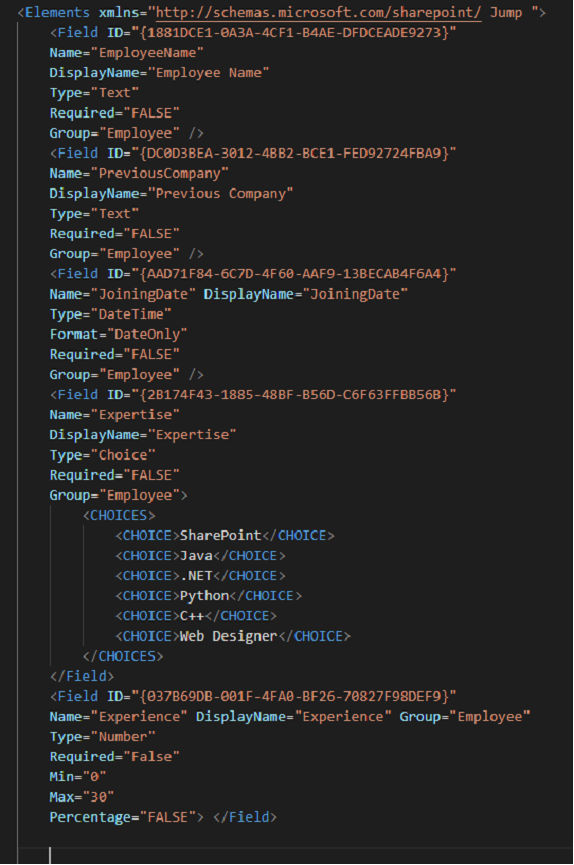
The complete elements.xml that are used within the project is given below.
<?xml version="1.0" encoding="utf-8"?>
<Elements xmlns="http://schemas.microsoft.com/sharepoint/ Jump ">
    <Field ID="{1881DCE1-0A3A-4CF1-B4AE-DFDCEADE9273}" Name="EmployeeName" DisplayName="Employee Name" Type="Text" Required="FALSE" Group="Employee" />
    <Field ID="{DC0D3BEA-3012-4BB2-BCE1-FED92724FBA9}" Name="PreviousCompany" DisplayName="Previous Company" Type="Text" Required="FALSE" Group="Employee" />
    <Field ID="{AAD71F84-6C7D-4F60-AAF9-13BECAB4F6A4}" Name="JoiningDate" DisplayName="JoiningDate" Type="DateTime" Format="DateOnly" Required="FALSE" Group="Employee" />
    <Field ID="{2B174F43-1885-48BF-B56D-C6F63FFBB56B}" Name="Expertise" DisplayName="Expertise" Type="Choice" Required="FALSE" Group="Employee">
        <CHOICES>
            <CHOICE>SharePoint</CHOICE>
            <CHOICE>Java</CHOICE>
            <CHOICE>.NET</CHOICE>
            <CHOICE>Python</CHOICE>
            <CHOICE>C++</CHOICE>
            <CHOICE>Web Designer</CHOICE>
        </CHOICES>
    </Field>
    <Field ID="{037B69DB-001F-4FA0-BF26-70827F98DEF9}" Name="Experience" DisplayName="Experience" Group="Employee" Type="Number" Required="False" Min="0" Max="30" Percentage="FALSE"> </Field>
    <ContentType ID="0x010029DD9E774C03404CAFA262D716A029D4" Name="EmployeeContentType" Group="Employee Content Types" Description="This is the Content Type for Employee Onboarding">
        <FieldRefs>
            <FieldRef ID="{1881DCE1-0A3A-4CF1-B4AE-DFDCEADE9273}" />
            <FieldRef ID="{DC0D3BEA-3012-4BB2-BCE1-FED92724FBA9}" />
            <FieldRef ID="{AAD71F84-6C7D-4F60-AAF9-13BECAB4F6A4}" />
            <FieldRef ID="{2B174F43-1885-48BF-B56D-C6F63FFBB56B}" />
            <FieldRef ID="{037B69DB-001F-4FA0-BF26-70827F98DEF9}" /> </FieldRefs>
    </ContentType>
    <ListInstance CustomSchema="schema.xml" FeatureId="00bfea71-de22-43b2-a848-c05709900100" Title="Employee" Description="Employee List created using SharePoint Framework" TemplateType="100" Url="Lists/Employee">
        <Data>
<Rows>
<Row>
<Field Name="EmployeeName">Adnan Shawkat</Field>
<Field Name="PreviousCompany">Microsoft</Field>
<Field Name="JoiningDate">10/08/2015</Field>
<Field Name="Expertise">SharePoint</Field>
<Field Name="Experience">7</Field>
</Row>
<Row>
<Field Name="EmployeeName">Kevin C</Field>
<Field Name="PreviousCompany">IBM</Field>
<Field Name="JoiningDate">11/04/2016</Field>
<Field Name="Expertise">Java</Field>
<Field Name="Experience">4</Field>
</Row>
<Row>
<Field Name="EmployeeName">Christopher</Field>
<Field Name="PreviousCompany">Oracle</Field>
<Field Name="JoiningDate">12/03/2014</Field>
<Field Name="Expertise">.NET</Field>
<Field Name="Experience">11</Field>
</Row>
</Rows>
</Data> </ListInstance>
</Elements>Note: List of feature ID will change depend on list template type.
Schema.XML
Finally, we will be creating the schema.xml file which contains the list xml. Here, we will be adding the Content Type that we have declared in the elements.xml.

The complete schema.xml will look like below.
<List xmlns:ows="Microsoft SharePoint" Title="Basic List" EnableContentTypes="TRUE" FolderCreation="FALSE" Direction="$Resources:Direction;" Url="Lists/Basic List" BaseType="0" xmlns="http://schemas.microsoft.com/sharepoint/ Jump ">
    <MetaData>
        <ContentTypes>
            <ContentTypeRef ID="0x010029DD9E774C03404CAFA262D716A029D4" />
        </ContentTypes>
        <Fields></Fields>
        <Views>
            <View BaseViewID="1" Type="HTML" WebPartZoneID="Main" DisplayName="$Resources:core,objectiv_schema_mwsidcamlidC24;" DefaultView="TRUE" MobileView="TRUE" MobileDefaultView="TRUE" SetupPath="pages\viewpage.aspx" ImageUrl="/_layouts/images/generic.png" Url="AllItems.aspx">
                <XslLink Default="TRUE">main.xsl</XslLink>
                <JSLink>clienttemplates.js</JSLink>
                <RowLimit Paged="TRUE">30</RowLimit>
                <Toolbar Type="Standard" />
                <ViewFields>
                    <FieldRef Name="LinkTitle"></FieldRef>
                    <FieldRef Name="EmployeeName"></FieldRef>
                    <FieldRef Name="PreviousCompany"></FieldRef>
                    <FieldRef Name="JoiningDate"></FieldRef>
                    <FieldRef Name="Expertise"></FieldRef>
                    <FieldRef Name="Experience"></FieldRef>
                </ViewFields>
                <Query>
                    <OrderBy>
                        <FieldRef Name="ID" /> </OrderBy>
                </Query>
            </View>
        </Views>
        <Forms>
            <Form Type="DisplayForm" Url="DispForm.aspx" SetupPath="pages\form.aspx" WebPartZoneID="Main" />
            <Form Type="EditForm" Url="EditForm.aspx" SetupPath="pages\form.aspx" WebPartZoneID="Main" />
            <Form Type="NewForm" Url="NewForm.aspx" SetupPath="pages\form.aspx" WebPartZoneID="Main" /> </Forms>
    </MetaData>
</List>
Before we can deploy the package, we have to update the feature in the package-solution.json file.
Update Package-Solution.json
Initially, the file contents will contain only the solution name. We must add the feature node as well to this file.
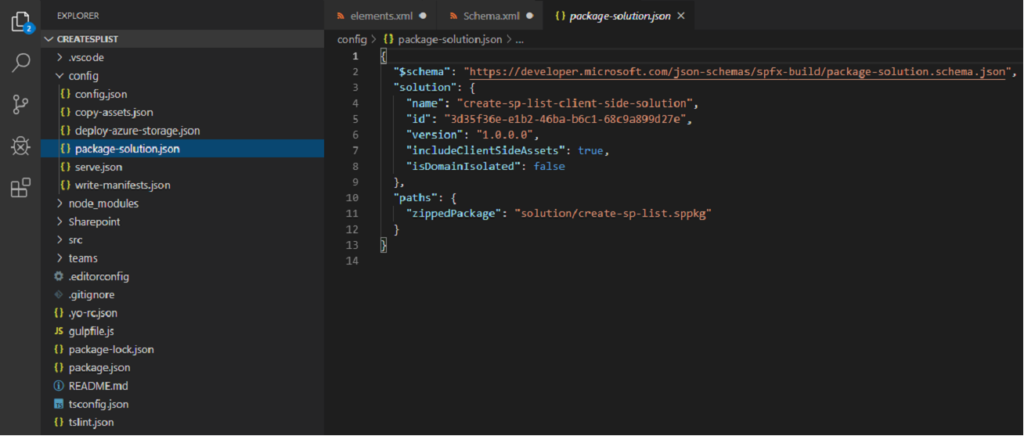
Add the below content after the version tag. Here, the id is a Visual Studio created GUID that identifies a unique feature.
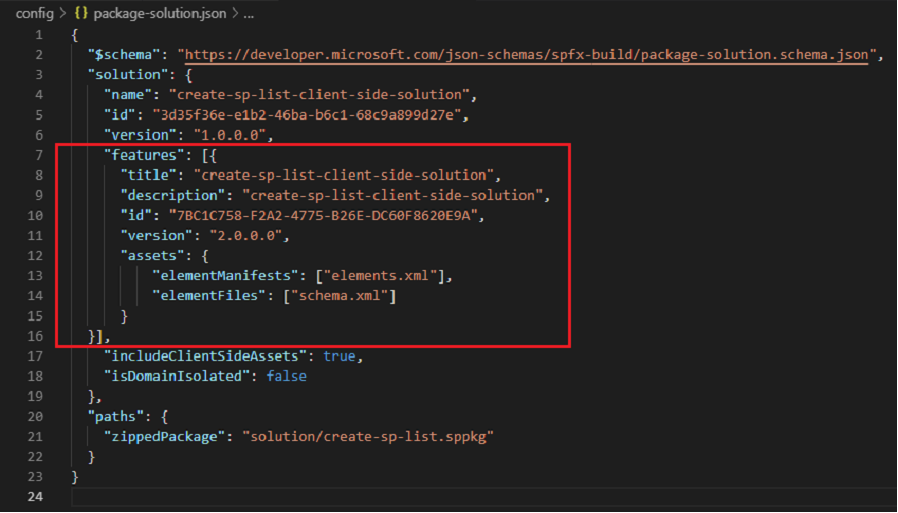
The contents of the package-solution.json will look like below.
{
    "solution": {
        "name": "create-sp-list-client-side-solution",
        "id": "f26589ce-0cd0-49c4-9ca3-f4a559851a0d",
        "version": "1.0.0.0",
        "features": [{
            "title": "create-sp-list-client-side-solution",
            "description": "create-sp-list-client-side-solution",
            "id": "7BC1C758-F2A2-4775-B26E-DC60F8620E9A",
            "version": "2.0.0.0",
            "assets": {
                "elementManifests": ["elements.xml"],
                "elementFiles": ["schema.xml"]
            }
        }]
    },
    "paths": {
        "zippedPackage": "solution/ create-sp-list.sppkg"
    }
}
Now, let’s package the solution using gulp bundle.
Package and deploy the Solution
Now, we must package and bundle the solution.
gulp bundle --ship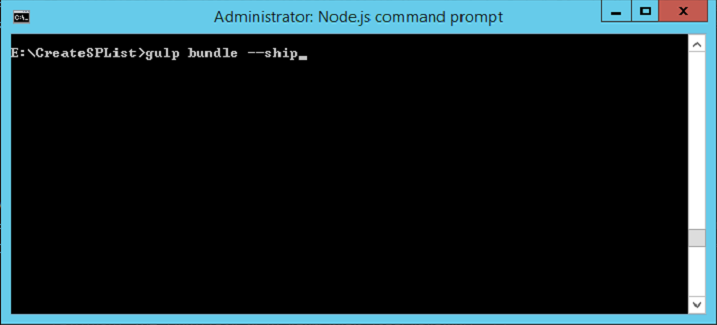
Thus, we are done with the packaging of the solution.
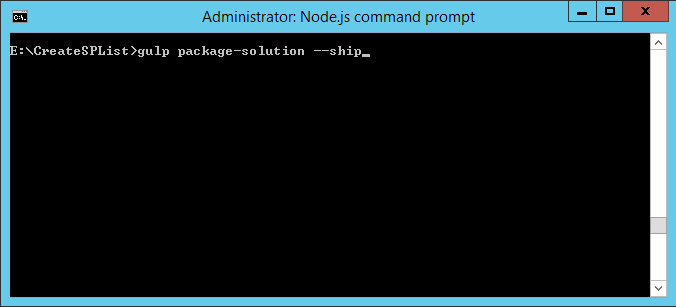
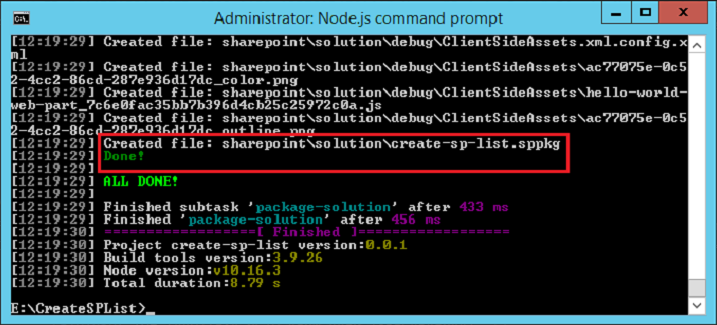
If we head over to the solutions folder, we can see the ‘create-sp-list package’ which we will be uploading to SharePoint
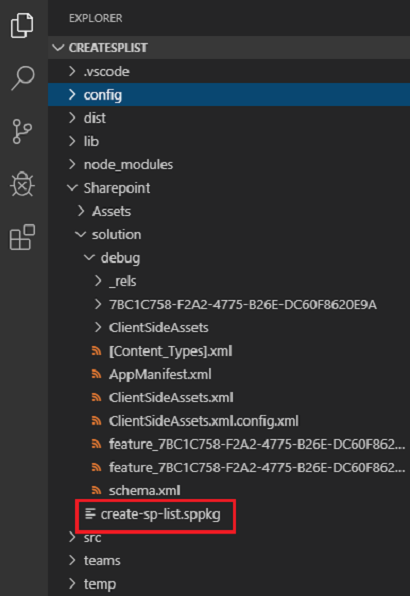
Make a note of the solution URL in the local computer as we will need it to upload to SharePoint.
Deploy SPPKG file in SharePoint Online.
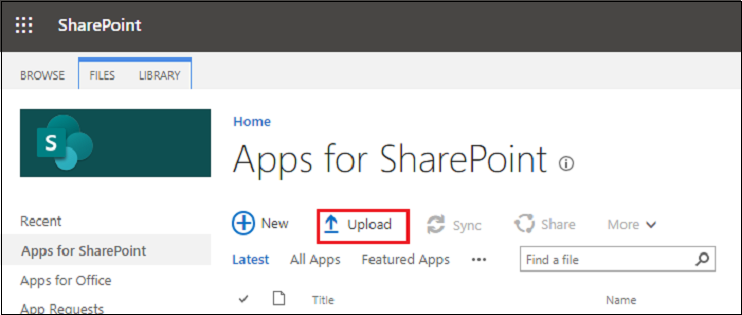
Let’s head over to the SharePoint App Catalog site to where we will be uploading the solution.
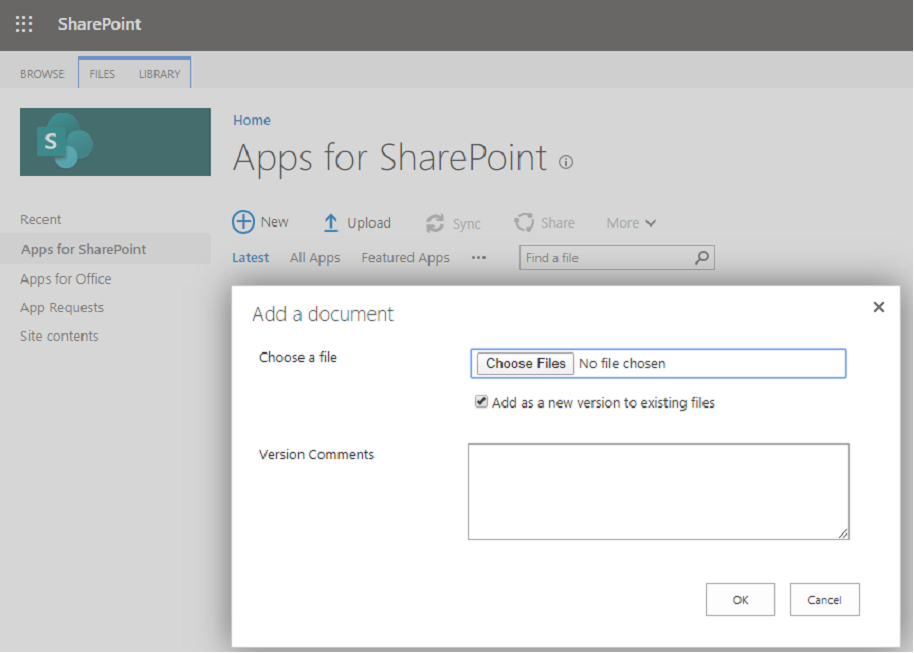
Click on Upload to add the solution file to the site.
Click on OK to complete the upload.
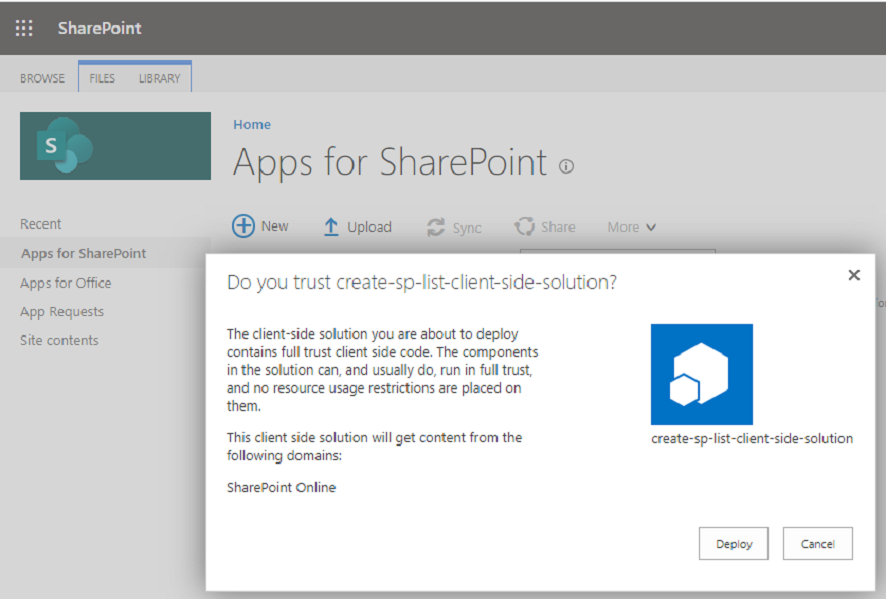
It will ask to trust and Deploy the solution to SharePoint.
We can see the uploaded solution in the App Catalog.
Now let’s head over to the site contents and add the solution to the site.
On searching for the deployed app, it will list out the recently added solutions.
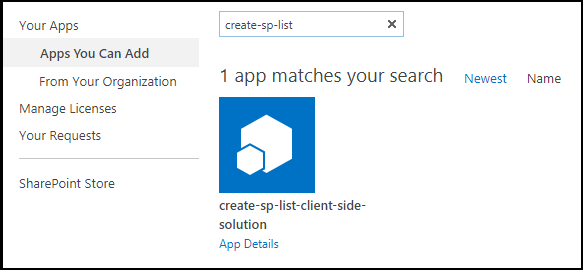
Click on it to add the solution to the site.
After a few seconds, we can see the newly created custom site.
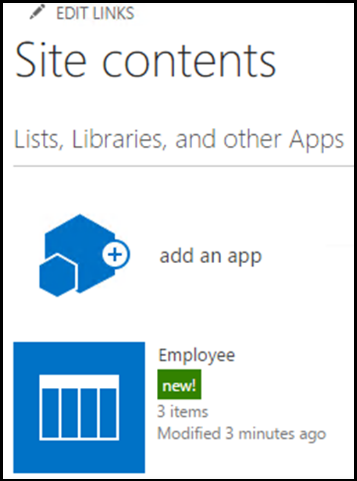
Going inside it we can see the default data that we had added to the list.
Summary
Thus, we saw how to create SharePoint List with custom Site Columns and Content Type using SharePoint Framework. We will see more of SharePoint Framework in action in the coming articles.